Last updated November 18, 2026
Free written scope consultation - allowances, timeline, and change-order rules on paper before a single trade is scheduled
DIY vs Professional Fence Installation: What’s Safe to Do Yourself
Here’s the part nobody tells you before you rent the auger: hanging fence panels is the easy half. Setting the posts is where the job is actually won or lost, and it’s the very first thing you do, before you’ve learned a single thing from the project. In our experience around Plano, a first-time DIY fence almost never fails at the pickets. It fails at the footing, six weeks later, when the first hard rain hits clay soil that swelled and then shrank. This guide maps exactly where the DIY risk sits, task by task, so you can decide with your eyes open instead of eight posts in.
Quick Answer
Panel hanging and basic gate assembly are reasonable DIY projects for a careful homeowner with the right tools. Layout and post setting are not, because post depth, plumb, spacing, and footing size in Plano’s expansive clay soil decide whether the fence is still straight after two summers, and a single failed post means pulling and resetting panels on both sides of it. If your fence line is longer than about 50 feet or the ground is clay, hiring a crew is usually the cheaper path once tool rental and one post-reset are counted.
Styles & brands we work with
- Kitchen remodeling
- Bathroom remodeling
- Home additions & ADU
- Roofing
- Windows & doors
- Driveway & pavers
- Fence
Table of Contents
- Task-by-task: where the DIY risk actually lives
- Layout and post setting: the step that decides everything
- Why Plano’s clay soil makes post setting harder than average
- The permit reality in Plano
- Real cost comparison: what DIY actually saves
- How to vet a fence contractor’s post-setting spec
- Common mistakes to avoid
- Frequently asked questions
Task-by-Task: Where the DIY Risk Actually Lives
Fence work isn’t one skill level. It’s four or five different jobs stacked together, and each one fails differently. Here’s how we break it down when a homeowner asks us whether to tackle their own fence in Plano.
- Layout and string line (high skill, high failure cost). Setting the corners, pulling a true line, and dividing the run into equal bays so no panel ends up a weird cut. Get this wrong and every panel downstream is off. You cannot fix layout after the concrete sets.
- Post hole digging and depth (moderate skill, high failure cost). Plano sits on heavy clay, and a hole that’s 18 inches deep when it should be 30 will hold for one season and then heave. Depth is not negotiable and it’s invisible once the dirt goes back.
- Post setting and concrete (moderate skill, high failure cost). Plumb in two directions, correct footing diameter, correct mix, correct cure. A post that’s a half-inch off plumb at the base is a visible lean by the end of the run.
- Panel hanging (moderate skill, low failure cost). This is the Instagram part. If you get a picket slightly off, you pull two screws and try again. Mistakes here are cheap and reversible.
- Gate installation (moderate skill, medium failure cost). Gates sag because the posts sag or because the frame wasn’t braced. If the posts are solid, most gates can be tuned later with hinges and a diagonal brace.
The pattern is clear: the failures that cost real money all happen in the first two days, and they’re all buried in the ground where you can’t inspect them later without a shovel. The work you can see, and therefore fix, is the work most homeowners worry about. It’s backwards.
Layout and Post Setting: The Step That Decides Everything
If you’re going to draw one line in the sand between DIY and professional fence installation, draw it here. Layout and post setting are where a good fence and a bad fence separate, and no amount of nice pickets fixes a bad post.
Here’s the order a crew actually works in, and why each step matters:
- Call 811 before you dig. Free service, marks utilities in a few business days. Cutting a gas or fiber line in a Plano subdivision is a five-figure mistake.
- Set the corners and pull a string line. Both ends and any angle get staked, then a taut line runs the whole length. Every post is checked against that line, not against the last post. This is what keeps a 120-foot run from wandering.
- Divide the run into equal bays. Post spacing is set by the panel width (usually 8 feet), and the remainder gets spread evenly so the end bays aren’t slivers. This math happens before the first hole, not after.
- Dig to frost-free depth and beyond. In North Texas that generally means 24 to 30 inches, wider at the base. A hole the depth of a shovel blade is not a footing.
- Set posts plumb in two directions. A level on one face is not enough. The post has to be checked front-to-back and side-to-side, and braced so it stays there while the concrete cures.
- Pour, crown, and wait. Concrete gets crowned slightly above grade so water sheds away from the post. Then it cures. You don’t hang panels the same afternoon.
Six steps, and five of them are invisible once the fence is up. That’s the whole problem with DIY post setting: you find out whether you got it right two summers from now, when the gate won’t latch and one panel has a lean.
If you’d rather hand that part to someone who has set thousands of posts in this soil, our Fence Installation in Plano page lays out how we spec the footing and the cure time on every job.
Why Plano’s Clay Soil Makes Post Setting Harder Than Average
Most fence guides are written for sandy or loamy soil. Plano is not that. The blackland and Houston Black clay under most of this city expands when it’s wet and shrinks when it’s dry, and that movement is the single biggest reason fences in Plano lean, heave, and fail early.
What that means in practice:
- Footings need to be wider, not just deeper. A bell-shaped hole, wider at the bottom than the top, gives the concrete something to grip so the clay can’t push the post up during a wet spring. A straight-sided hole in expansive clay is a post extractor.
- Cure time is longer than you think. Concrete in a footing needs several days to reach meaningful strength, and it should stay damp-ish, not baked. In a Plano July, a footing that dries too fast can crack before it ever carries a load.
- Water management matters as much as the pour. Clay holds water against a post. If the crown is flat or the concrete sits below grade, the post soaks and rots years earlier than it should, even pressure-treated lumber.
- The wet/dry cycle never stops. A fence that’s perfect in October can show movement by the next April. Good footings are built for that cycle. Cheap footings are built for the day they’re poured.
We’ve watched the same failure repeat across Plano neighborhoods: a homeowner sets posts 18 inches deep in a straight hole, the fence looks great for a season, and the first wet winter lifts two or three posts and racks the whole run. That’s not bad luck. It’s a footing spec that ignored the soil.
The Permit Reality in Plano
This is where a lot of DIY fences get expensive later, and where a lot of contractors quietly cut corners. In Plano, fence height, location on the lot, and the corner sight-triangle rules are what usually trigger a permit requirement. A standard 6-foot privacy fence inside your own rear or side yard typically doesn’t need one, but a taller fence, a fence in a front yard, a fence near a corner, or anything touching an easement often does.
Here’s the part homeowners don’t hear until they’re selling:
- Unpermitted work shows up at resale. A buyer’s inspector flags it, the title company asks for documentation, and suddenly you’re filing for a permit after the fact or negotiating a credit. A fence that needed a permit and didn’t get one is a closing-table problem.
- Yes, a homeowner can usually pull their own permit. You’re allowed to permit work on your own property in most cases. What’s harder is knowing whether your specific fence triggers one, filling out the application correctly, and being on-site for the inspection.
- The inspection is not the enemy. A fence inspection checks setbacks and height against the plat. If it passes, you have a piece of paper that answers every future question about that fence. That’s worth having.
Our rule is simple: if there’s any question whether a fence in Plano needs a permit, we pull it. The permit inspector works for you, not for us, and a signed inspection is one less thing to explain when you sell. That same standard applies across everything we build, from fences to a Home Additions & ADU in Plano where the permit questions get a lot bigger.
Real Cost Comparison: What DIY Actually Saves
On paper, DIY looks like a huge win. In practice, the savings shrink fast once you count the things that don’t show up in the material quote. Here’s the honest math for a typical 150-foot, 6-foot cedar privacy fence in Plano.
| Line Item | Rough Range | Notes |
|---|---|---|
| Materials (posts, panels, rails, concrete, hardware) | $18 – $28 per linear foot | Bagged concrete like Quikrete or Sakrete adds up fast at one bag per post |
| Tool rental (auger, mixer, levels, generator) | $150 – $350 for the project | Two-day rental is common; a third day for panels adds cost |
| Material overage from miscuts and bad layout | 5 – 10% of material cost | Highest on first-time fence builds |
| One post reset (labor, concrete, replacement panel) | $200 – $450 | Realistic probability on first-timer clay-soil footings |
| Professional crew, installed | $32 – $55 per linear foot | Varies with material, height, gate count, and site access |
Run the numbers on a 150-foot fence and DIY lands somewhere in the $3,000 to $4,500 range all-in, while a professional install runs roughly $4,800 to $8,250. The gap is real but narrower than the material-only quote suggests, especially if one post resets. What you’re paying a crew for is not the panel hanging. It’s the layout, the footing spec, the cure time, and the fact that if a post leans in year two, someone comes back and fixes it.
If your project also involves replacing the approach and the driveway apron behind the fence, the same logic applies: that’s Driveway & Pavers in Plano territory, and the base prep under the pavers matters as much as the post footings do here.
How to Vet a Fence Contractor’s Post-Setting Spec
Most fence quotes don’t mention post setting at all. That’s not an accident. The two questions below are the fastest way to find out whether a contractor is building a fence to last or a fence to look good on install day.
- “How deep are you setting the posts, and how wide is the footing?” A real answer sounds like “24 to 30 inches deep with a bell-shaped base, wider at the bottom.” A bad answer sounds like “standard depth.” There’s no such thing as standard depth in clay soil. If they can’t state a number, they’re guessing.
- “How long after you pour the footings before you hang panels?” A solid crew waits at least a day, often longer in hot weather. A crew hanging panels one hour after the pour is a crew that will hand you a leaning fence. This one question tells you more about a contractor than three references.
Two more worth asking while you’re at it: “Will you pull the permit if one is required?” and “What happens if a post leans in the first year?” A written answer to the second question is what separates a crew with a warranty from a crew with a phone number.
If you want a starting point, our fence installation page for Plano spells out our post-setting spec and what we put in writing, and you can see the broader set of trades we handle on the Barrett & Sons Construction Plano home page.
Common Mistakes to Avoid
- Digging before you call 811. Utility lines run along a lot of Plano fence lines, and a cut gas or fiber line turns a weekend project into a claims call.
- Setting posts by eye against the last post instead of a string line. The error compounds down the run. By panel ten, you have a visible curve.
- Using a straight-sided, shallow hole in clay. Plano’s expansive soil will lift a shallow footing in a wet spring. Bell the base and go deeper than you think you need to.
- Hanging panels the same day as the pour. Green concrete moves. Wait for the cure, or you’re installing on a footing that isn’t holding yet.
- Leaving the concrete crown flat or below grade. Water pools at the base, the post soaks, and the rotting clock starts early.
- Skipping the permit because “it’s just a fence.” The permit shows up missing at resale, not at install. It’s cheaper to pull it up front.
- Buying the cheapest bagged concrete and guessing at the mix. Quikrete, Sakrete, and similar brands publish the yield per post on the bag. Guessing puts you one bag short on post fourteen.
See the difference
 Before
 After
 Before
 After
 Before
 After
When to Call a Professional
Call a professional fence installer in Plano if any of these apply: the run is longer than about 50 feet, the ground is heavy clay, the fence is taller than 6 feet, you need a gate that lines up perfectly with a driveway or a walkway, there’s a permit question, or you can’t commit a full weekend plus a cure day before you start hanging panels. Any one of those tips the math toward hiring. All of them together make the decision for you. Barrett & Sons Construction Plano offers free estimates in Plano and pulls the permit on any fence that needs one. Call (877) 382-4108 to schedule yours.
Frequently Asked Questions
Yes, most homeowners can legally install their own fence in Plano, and you’re generally allowed to pull your own permit if one is required. The real question is whether your footing and layout will hold up in clay soil. Hanging panels is fine to DIY; post setting is where most first-time fences fail.
Generally 24 to 30 inches deep, with a bell-shaped footing wider at the base than the top. The bell is what keeps the concrete anchored against clay expansion and contraction. A straight-sided hole at 18 inches is a post that will lift within a couple of wet seasons.
It depends on height, location, and proximity to corners or easements. A standard 6-foot privacy fence inside your own rear yard usually doesn’t need one, but a taller fence, a front-yard fence, or anything near a corner often does. If there’s any question, we pull it.
Roughly $32 to $55 per linear foot installed, depending on material, height, and gate count. That compares to about $18 to $28 per linear foot for materials alone on a DIY build, before tool rental and any post resets. Call (877) 382-4108 for an exact quote on your line.
Not without a written change order signed before the work happens. Every scope change and material substitution gets priced in writing first. That’s a standing rule on every job we take, and it applies to a fence in Plano the same as to a kitchen.
A 150-foot privacy fence typically takes two to three working days, plus cure time on the footings. A crew that quotes you a single day is likely hanging panels on green concrete. We’d rather spend the extra day and hand you a fence that stays straight.
The Bottom Line
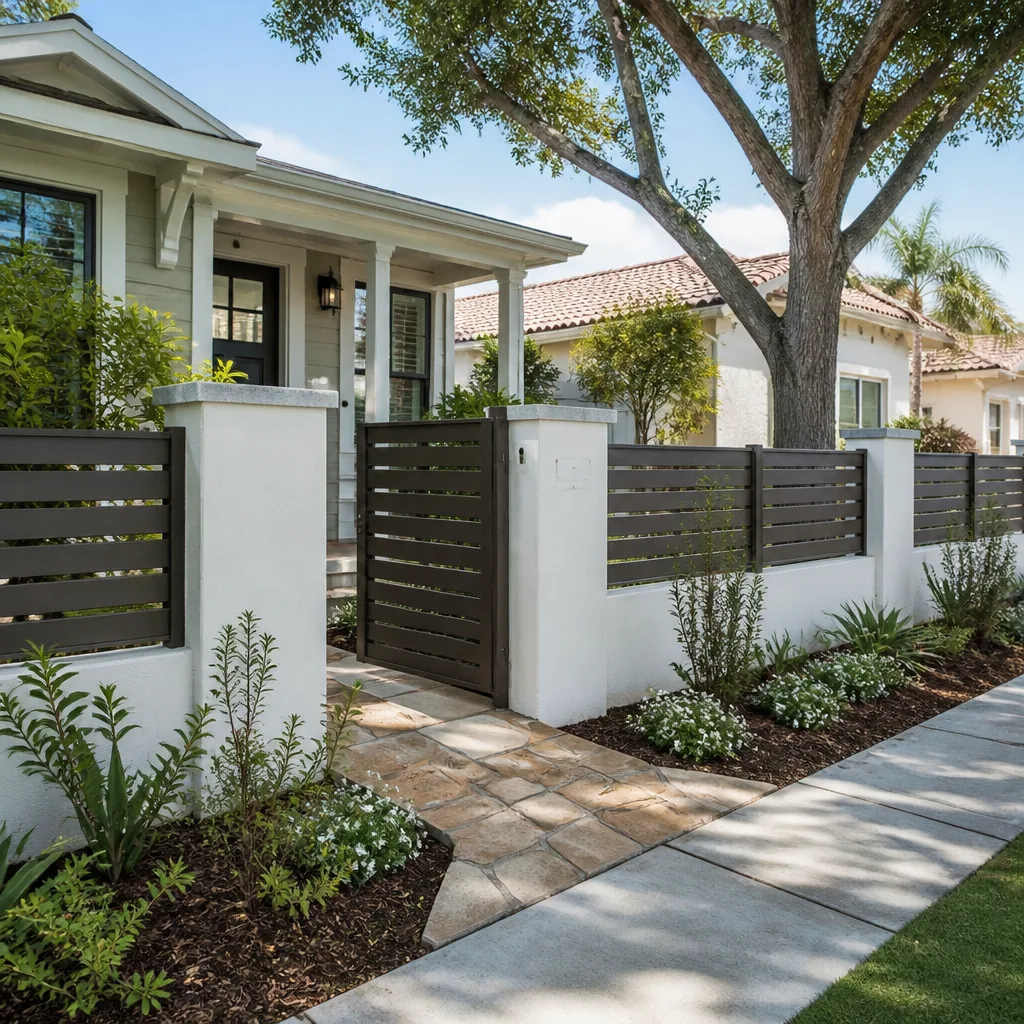
Fence installation splits cleanly in two: the visible work you can fix cheaply, and the buried work you can’t fix without digging it up. Panel hanging and gate tuning are reasonable DIY projects for a careful homeowner. Layout, post depth, footing shape, and cure time in Plano’s clay soil are the steps where a first-time build usually goes wrong, and they happen first, before you’ve learned anything. If you want a footing spec you can trust and a crew that waits for the concrete, call (877) 382-4108 for a free estimate. We’ve served Plano and the surrounding towns for over 29 years, and we back every fence with a 90-Day Done Right Promise in writing.
Rewriting a fence is not the way to spend a summer. Once you’ve got the fence sorted, the next projects on the list usually follow, and we’re glad to look at those too. If you’re planning a garage conversion or a detached unit, see our ADU page, and if you’re refreshing the front of the house, the main page covers every trade we run crews for.
Written by the team at Barrett & Sons Construction Plano.